The Best Way to Tie Your Shoes
Shoes don’t always have the perfect fit, no matter how many styles you try on. To help improve your shoe fit even more, there are multiple ways to tie up your shoes! Whether you have a high arch, narrow feet or bunions, there are different lacing techniques to try.
The Best way to Tie your Shoes for a
High Arch/Bump on Foot
If you have a high arch and/or a bump on the top of your foot, the top of the shoe can cause rubbing. Some people will keep their laces very loose. In the cases where this does solve the problem, it can create other ones such as heel slippage and/or the toes hitting the front of the shoes.
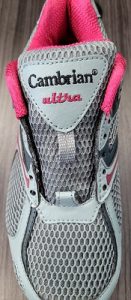
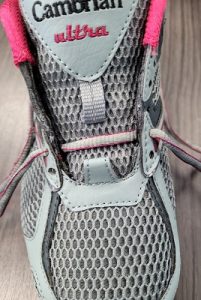
There is a lacing solution to prevent this rubbing and keep the shoes snug on the feet. This way provides an opening/a space for the highest part to push through. The best way to name this is “skip an eyelet”. An eyelet is the hole that your lace feeds through. Here are the steps:
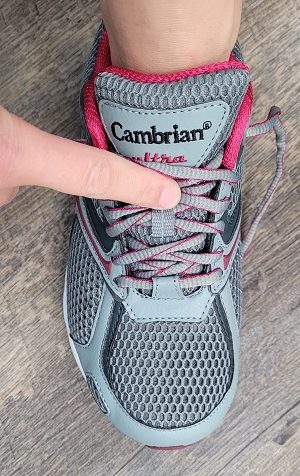
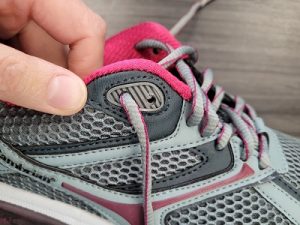
- Put on your shoe, find the highest point of your foot and where it touches on the shoe. Remember this spot

- Unlace your shoes to the eyelet past your marked spot
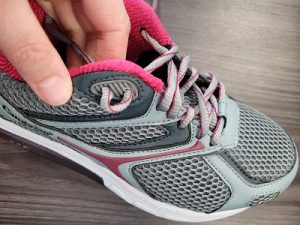
- From here, begin to re-lace your shoes. For the first section ONLY, lace your shoes straight up instead of diagonally.
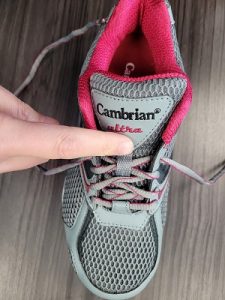
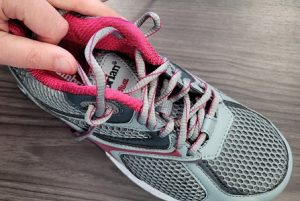
- After both sides have been laced straight up, continue to lace the rest of the shoe normally (diagonally).
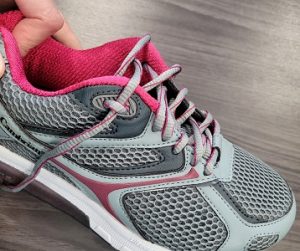
When done properly, there will be an opening in the laces where the highest part/painful spot is.
The Best way to Tie your Shoes for
Heel Slippage/Narrow Heels
If your heels slide up and down in the shoe, some people will reduce their shoe size to prevent this from happening. This is not ideal, because it does not address the root cause of the heel slippage, and it can lead to other issues with the toes. A couple reasons why heel slippage may occur, is because the heel in the shoe is wider than your heels or the shoe is too deep for your feet. In both cases, there are a couple ways to tie your shoes that help to keep the heel firmly into the back of the shoe.
The first technique to try is using the very last eyelet on the shoe. In most running shoes, there is an extra eyelet (lace hole) that is not being used. Use this last eyelet to provide a more secure grip on the heel.
If this does not completely resolve the issue, or your shoe does not have an extra eyelet, use the next technique, the heel lock.
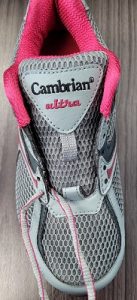
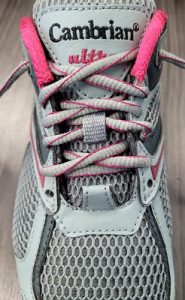
Heel Lock
The heel lock is an extra step above using the last eyelet of the shoe. It provides a more secure hold for your heels.
- Make sure you have an open eyelet (lace hole) at the very top. You may have to unlace down one eyelet if necessary.
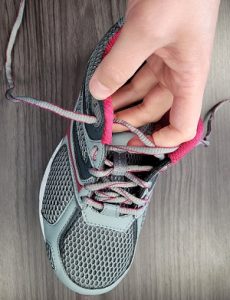
- Take the lace on one side of the shoe, and feed it down the next eyelet up (last eyelet). Do not cross this lace to the other side (yet).
- Repeat this step on the other side. You should now have two loops, one on each side.
- Now, cross the lace over to the other side, and feed it through the loop. Repeat on the opposite side.
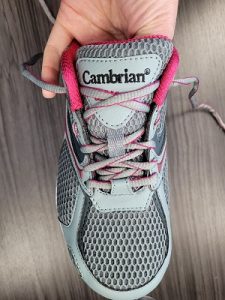
- Tighten the laces and tie them as your normally would. To tighten the laces, you may have to pull the laces up and down (towards your heel) a couple times to make sure the loops are tight as well.
This provides a more secure grip on your heel to prevent it from sliding up and down!
Bunion/Toe Pain
If you have a bunion or pain in the big toe, the first step is finding the proper shoe. Make sure the shoe is wide enough for your feet and it has no hard pieces running over the big toe joint/bunion area.
To provide extra room at the first toe joint, you can re-lace the shoe to avoid this joint.
- Unlace the shoe completely
- On the outside of the shoe, feed the lace through the first eyelet (lace hole). You will now have two lace ends to use from here.
- Instead of lacing one end to the first eyelet on the opposite side, use the SECOND eyelet on the opposite side.
- For the other lace end, use the second eyelet on the same side instead of crossing it over. Both laces should now be fed through the second eyelet on either side.
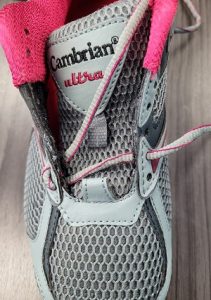
- From here, lace up the remainder of the shoe as normal.

The first eyelet on the inside of the shoe should be empty. This will allow the first toe joint to have more room!
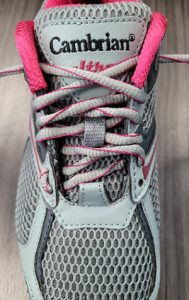
If you also feel the outside of the foot could use room, completely skip the bottom eyelets. This is the “skip an eyelet” technique used at the very bottom.
- Unlace the shoe completely
- Avoid the first eyelets on both sides and start your laces on the second eyelet (on both sides)
- Lace up the rest of the shoe like you normally would.
This will provide extra room on either side of the ball of the foot!
Laces Too Short
If your laces are too short, use the “skip an eyelet” technique above to give you more lace. Instead of opening up a space in a specific spot, it can be done at any point in the laces. The only consideration is to go down a couple eyelets from the top. This will provide a more secure fit at the top of the shoe, where it is most important to keep your foot in place. Somewhere in the middle of the shoe would be the best place to skip the eyelet.
Hopefully these were some helpful lacing techniques to use for your specific shoe fit!
For more information, please contact us or book an appointment!
You must be logged in to post a comment.