How are orthotics made?
When orthotics are made custom for each person and each foot, there is a process to make each pair unique. Since digital methods have been more available, it has created more variation on how orthotics are made. Each stage is very similar, but how it is done can vary.
Preliminary Stage
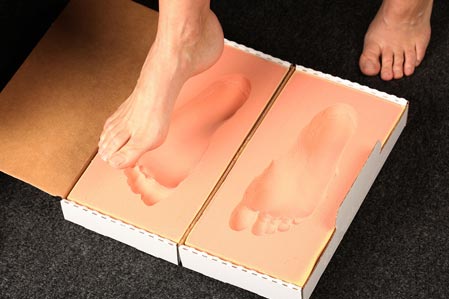
To make custom orthotics, it’s important to start with an assessment and a casting of the foot.
The assessment determines the design of orthotic. The design is very important as it provides the materials and features for appropriate function, comfort and pain relief.

Casting the foot is another very important preliminary step as it provides the arch shape in the orthotic.
Handmade vs Digital
An orthotic made handmade is when the orthotics are made from start to finish without digital intervention.
When the orthotic is made digitally, there are typically some handmade components to the manufacturing. The steps in the manufacturing process that can be done digitally are at the beginning stages, such as the casting, cast modifications and creating the shell.
It is hard to determine which method is “better” as both methods will work. Patients that have tried both may have a preference. The reason is not clear, but it could be the way each cast is produced, or it could be unrelated to the digital vs handmade method. Because each practitioner is different, each orthotic is typically made slightly different.
Handmade Orthotic
Orthotics that are made completely handmade start with a physical cast. This cast can be made in various ways, such as a foam box, plaster cast or wax casting.
Positive Model
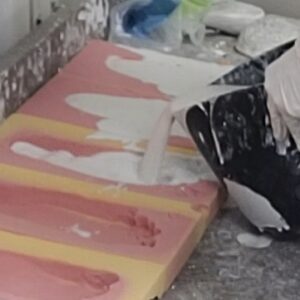
Once the cast has been taken, the positive model is made by pouring plaster into the cast. After this plaster model hardens, it is cleaned off to create the model that can be used to start making the physical orthotic. In some cases, this model needs to be modified before moving onto the next step. In this stage, the arches can be modified, certain angles can be added, or grooves can be added. Changes at this stage will be directly transferred to the shell of the orthotic.
Shell
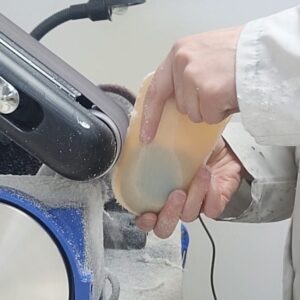
Now that the positive model is ready, the chosen material for the shell is heated up and vacuum pressed on to the model. The shell stays under the vacuum press until it cools enough to prevent further deformation.
The shell is now taken to the grinder to be shaped. At this stage, considerations such as the heel height and the shell width are taken into consideration. If the orthotic is fitting into a smaller shoe, the shell width and heel height will likely be smaller. If the orthotic is fitting into a wider and deeper shoe, the shell width and heel height can be a lot wider and deeper for additional support.
Additions
Additions are now added directly to the shell. There are many different additions that can be added to the orthotic, which all depend on the foot and what goal the orthotic is trying to achieve. For example, a metatarsal pad can be added for pain at the ball of the foot, or a heel cushion can be added for heel pain.
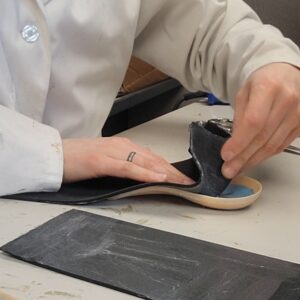 Covers
The last stage of manufacturing the orthotic is to add the covers. These are the final layers to protect all the additions, prevent peeling, and in some cases provide cushioning and length.
The top cover is what the bottom of the feet will come in contact with as you wear the orthotic. A bottom layer can be added to protect any exposed additions or to add extra strength to the orthotic.
Digital Orthotic
In the same way the handmade orthotics start with a physical cast, a digital cast also needs to be created. There are different ways of creating a digital cast. There are scanners as well as machines that read the height of each pin pressed against the bottom of your feet. To create a true custom orthotic, these need to create a 3D image, not a 2D image of the foot.
Once the digital cast is created, a program on the computer creates what will be physically made. This can be the positive model of the foot, the physical shell only, or the physical shell with the additions added. When creating the physical product from the digital copy, it can be done different ways such as a 3D printer or milled out from a block of material.
Trimming the Orthotic
Whether the orthotic is made handmade or digitally, it needs to fit inside the shoe!
For a half or ¾ length device, the orthotic will likely fit inside the shoe with little to no changes. For a full-length device, it is trimmed to fit the shoes. They are typically left long and wide to make sure the orthotic will fit properly inside the provided shoe.
If you have any questions or would like more information, feel free to contact us or book an appointment!
You must be logged in to post a comment.